
Getting Started with Android
This guide describes how to set up your development environment for Cordova and run a sample application. Note that Cordova used to be called PhoneGap, so some of the sites still use the old PhoneGap name.
- Requirements
- Eclipse 3.4+
- Install SDK + Cordova
- Download and install Eclipse Classic
- Download and install Android SDK
- Download and install ADT Plugin
- Download the latest copy of Cordova and extract its contents. We will be working with the Android directory.
- Setup New Project
Launch Eclipse, and select menu item New Project
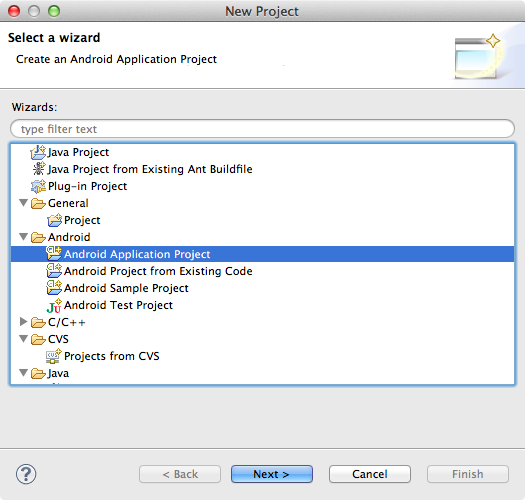
Then specify new application project
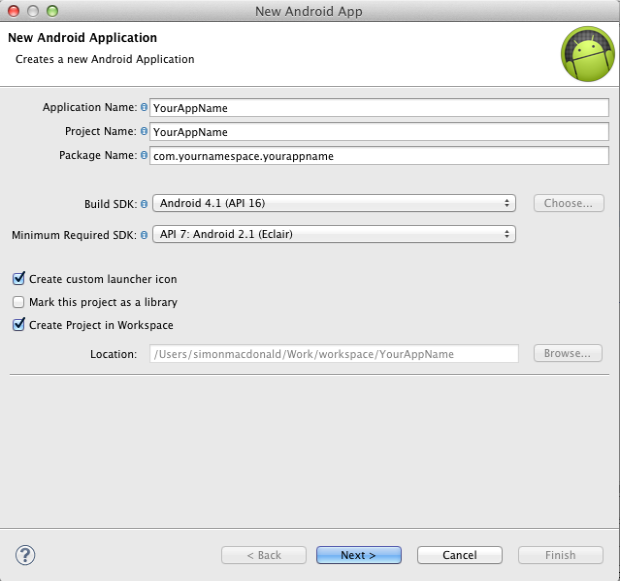
Then speciy an Application Name, a Project Name and Package Name with Namespace
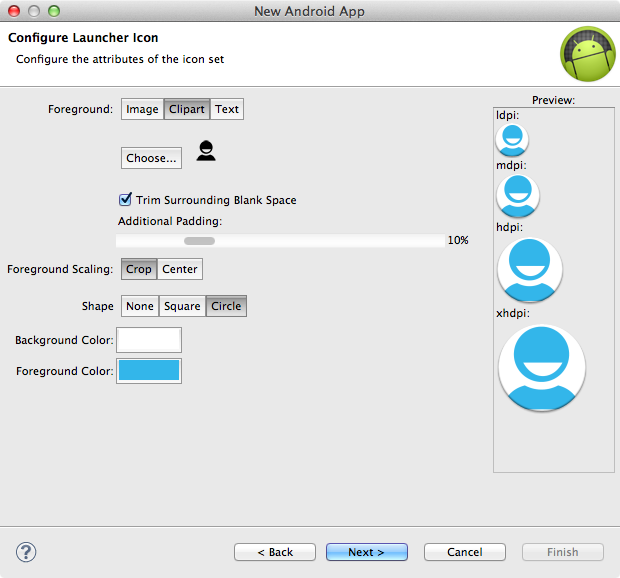
Then select a graphic
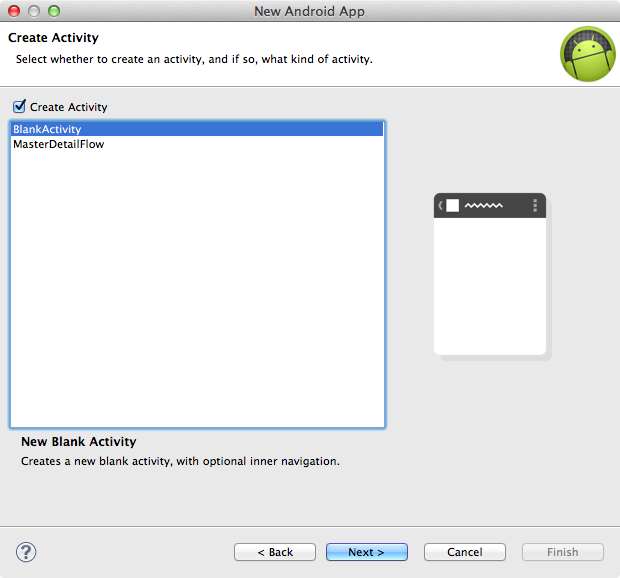
Then Create a Blank Activity
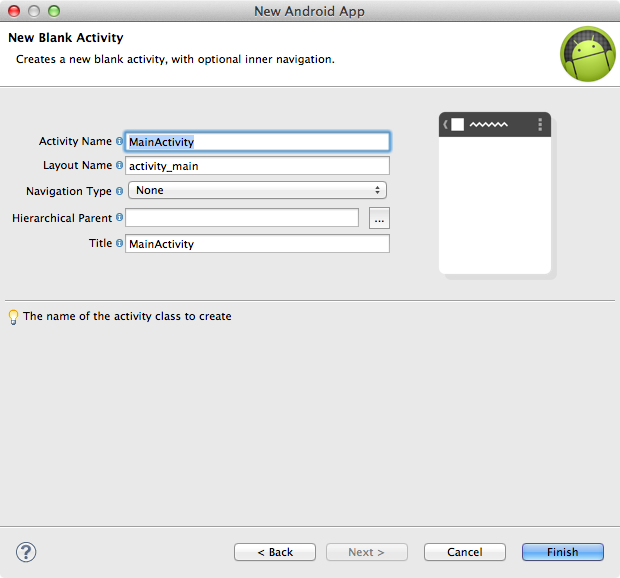
Make sure the activity doesn't inherit from anything. You most likely won't have PhoneGap on your Eclipse Workspace. Once this is done, click finish
In the root directory of your project, create two new directories:
- /libs
- assets/www
Copy cordova-2.0.0.js from your Cordova download earlier to assets/www
Copy cordova-2.0.0.jar from your Cordova download earlier to /libs
Copy xml folder from your Cordova download earlier to /res
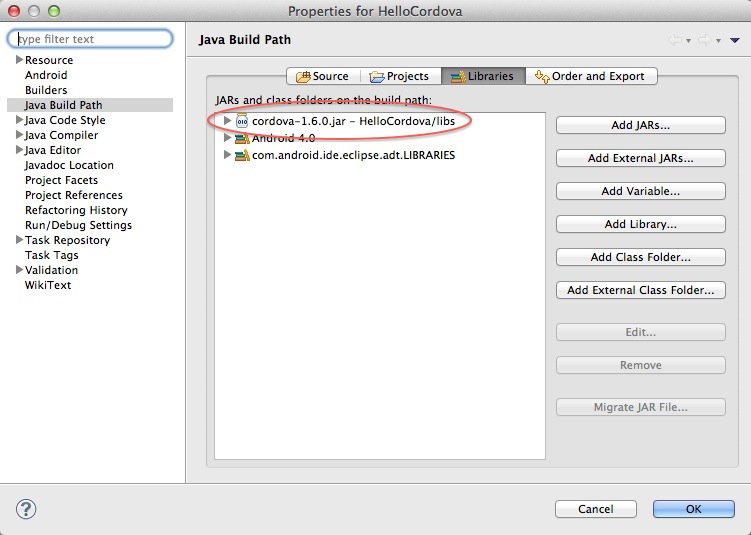
Verify that cordova-2.0.0.jar is listed in the Build Path for your project. Right click on the /libs folder and go to Build Paths/ > Configure Build Path.... Then, in the Libraries tab, add cordova-2.0.0.jar to the project. If Eclipse is being temperamental, you might need to refresh (F5) the project once again.
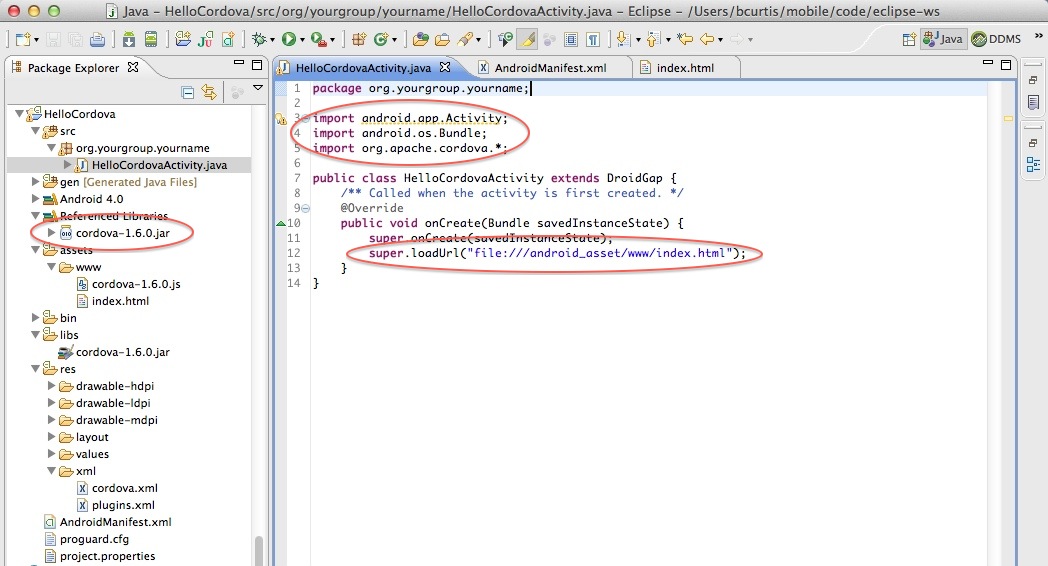
Edit your project's main Java file found in the src folder in Eclipse:
- Add import org.apache.cordova.*;
- Change the class's extend from Activity to DroidGap
- Replace the setContentView() line with super.loadUrl("file:///android_asset/www/index.html");
Right click on AndroidManifest.xml and select Open With > Text Editor
Paste the following permissions between the <uses-sdk.../> and <application.../> tags.
  <supports-screens
      android:largeScreens="true"
      android:normalScreens="true"
      android:smallScreens="true"
      android:resizeable="true"
      android:anyDensity="true" />
  <uses-permission android:name="android.permission.VIBRATE" />
  <uses-permission android:name="android.permission.ACCESS_COARSE_LOCATION" />
  <uses-permission android:name="android.permission.ACCESS_FINE_LOCATION" />
  <uses-permission android:name="android.permission.ACCESS_LOCATION_EXTRA_COMMANDS" />
  <uses-permission android:name="android.permission.READ_PHONE_STATE" />
  <uses-permission android:name="android.permission.INTERNET" />
  <uses-permission android:name="android.permission.RECEIVE_SMS" />
  <uses-permission android:name="android.permission.RECORD_AUDIO" />
  <uses-permission android:name="android.permission.MODIFY_AUDIO_SETTINGS" />
  <uses-permission android:name="android.permission.READ_CONTACTS" />
  <uses-permission android:name="android.permission.WRITE_CONTACTS" />
  <uses-permission android:name="android.permission.WRITE_EXTERNAL_STORAGE" />
  <uses-permission android:name="android.permission.ACCESS_NETWORK_STATE" />
  <uses-permission android:name="android.permission.GET_ACCOUNTS" />
  <uses-permission android:name="android.permission.BROADCAST_STICKY" />
*Note You are adding a blanket list of permissions to your application. You should remove permissions you aren't using before submitting your application to Google Play.
Support orientation changes by pasting the following inside the <activity> tag.
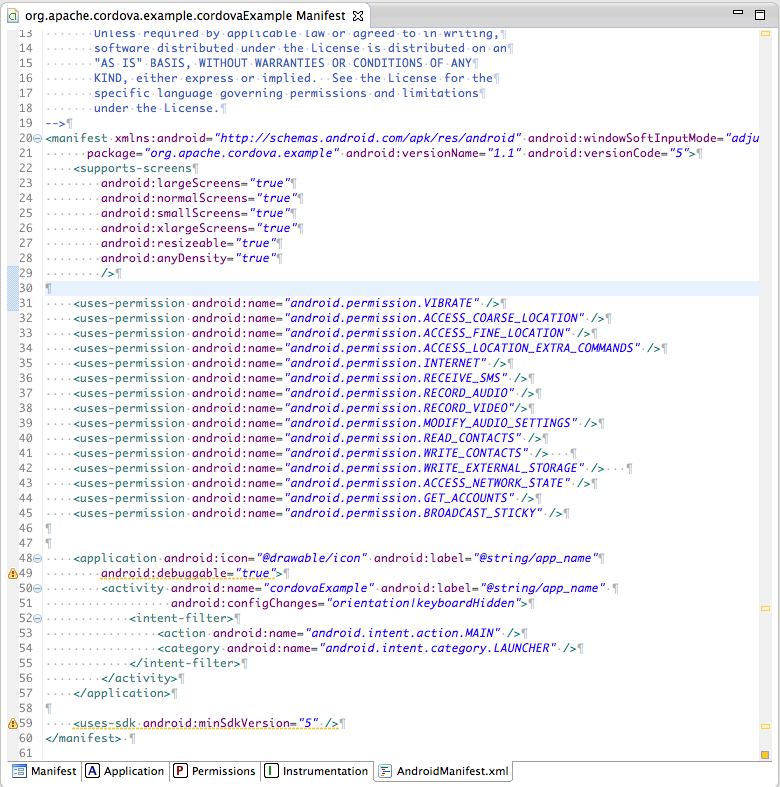
android:configChanges="orientation|keyboardHidden"Your AndroidManifest.xml file should look like
- Hello World
Create and open a new file named index.html in the assets/www directory. Paste the following code:
  <!DOCTYPE HTML>
  <html>
  <head>
  <title>Cordova</title>
  <script type="text/javascript" charset="utf-8" src="cordova-1.9.0.js"></script>
  </head>
  <body>
  <h1>Hello World</h1>
  </body>
  </html>
5A. Deploy to Simulator
- Right click the project and go to Run As > Android Application
- Eclipse will ask you to select an appropriate AVD. If there isn't one, then you'll need to create it.
5B. Deploy to Device
- Make sure USB debugging is enabled on your device and plug it into your system. (Settings > Applications > Development)
- Right click the project and go to Run As > Android Application
Done!
Sources & archive notes
Recovered repository material is attributed to its original authors and distributed with its source license. Changes: FreeSoft layout, archive context, navigation, link and image locations. Apache License 2.0 · Notices and provenance. Editorial material is labeled separately.